Don't Bin That Device: The UK Vaper's Essential Guide to Coil Care and Replacement
Don't Bin That Device: The UK Vaper's Essential Guide to Coil Care and Replacement
Walk into any British high street and you'll spot them in the bins outside vape shops: perfectly good devices discarded because they've lost their punch. It's a costly mistake that's happening up and down the country, from Glasgow to Brighton. The truth is, nine times out of ten, your 'knackered' vape just needs a new coil.
At Packman Vape, we see this wasteful cycle daily. Customers come in ready to splash out on a brand new kit when a £3 coil replacement would solve their problems. Let's break down everything you need to know about these tiny but crucial components.
What Actually Is a Vape Coil?
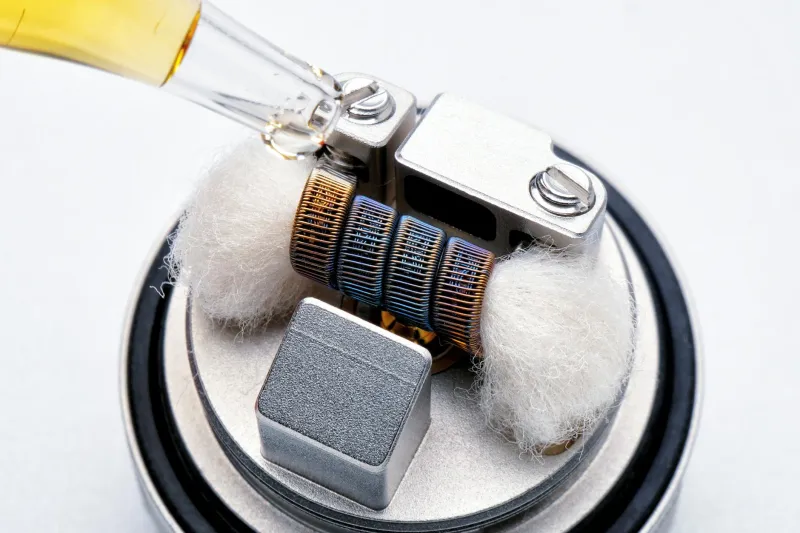
Think of your coil as the engine of your vaping experience. It's a small metal component wrapped in wire (usually kanthal, stainless steel, or nichrome) with a cotton wick running through it. When you press that fire button, electricity flows through the wire, heating it up and vaporising the e-liquid soaked into the cotton.
This seemingly simple process is what transforms your favourite shortfill into those satisfying clouds. But like any hardworking component, coils don't last forever.
The Tell-Tale Signs Your Coil's Past Its Best
British vapers are generally a practical bunch, but many miss the obvious warning signs that their coil needs replacing. Here's what to watch for:
Burnt or Metallic Taste: If your usually delicious strawberry and cream suddenly tastes like you're licking a copper pipe, your coil's crying out for replacement. This metallic tang often appears before the dreaded burnt cotton flavour kicks in.
Reduced Vapour Production: Remember when your device produced proper clouds? If you're now getting wisps that wouldn't impress a toddler, your coil's likely clogged with residue from weeks of faithful service.
Gurgling Sounds: That unpleasant bubbling noise isn't your device trying to communicate in some secret vape language. It usually means your coil's flooded or the cotton's degraded, allowing e-liquid to pool where it shouldn't.
Leaking: While not always coil-related, persistent leaking often indicates the coil's seals have degraded or the cotton's no longer wicking properly.
Harsh Throat Hit: If your usually smooth 3mg liquid suddenly feels like swallowing gravel, your coil might be running too hot due to carbon buildup.
Extending Coil Life: Practical Tips for British Vapers
Before we dive into replacement, let's talk about making your coils last longer. With the cost of living pressures we're all facing, every penny counts.
Prime Your Coils Properly: New coils are bone dry when you install them. Drop 3-4 drops of e-liquid directly onto the exposed cotton, fill your tank, then wait 5-10 minutes before vaping. This patience pays dividends in coil longevity.
Avoid Chain Vaping: We get it – sometimes you just want to puff away, especially during a stressful commute on the M25. But constant vaping doesn't give the cotton time to re-saturate, leading to dry hits and burnt cotton.
Choose Your E-Liquids Wisely: High-VG liquids and heavily sweetened flavours (looking at you, dessert vapers) can gunk up coils faster than a London drain in autumn. If you're devoted to sweet flavours, consider rotating with cleaner options.
Regular Cleaning: For rebuildable atomisers, a weekly clean with warm water can work wonders. Even pre-built coils benefit from a gentle rinse when they start tasting off – though this is more of a temporary fix.
Proper Storage: Leaving your device in a hot car or freezing garage puts unnecessary stress on your coils. Room temperature storage keeps everything happy.
Matching Coil Resistance to Your Vaping Style
This is where many British vapers get confused, and understandably so. Coil resistance, measured in ohms, dramatically affects your vaping experience.
Higher Resistance (1.0Ω and above): Perfect for mouth-to-lung vaping, these coils work brilliantly with higher nicotine e-liquids and nic salts. They're ideal for ex-smokers seeking that familiar cigarette-like draw. Think of them as the sensible estate car of the vaping world – reliable, efficient, and perfect for daily use.
Lower Resistance (0.5Ω and below): These are your direct-lung coils, designed for cloud production and intense flavour. They require more power and work best with higher-VG liquids and lower nicotine strengths. They're the sports car option – exciting but thirsty for both e-liquid and battery power.
The Sweet Spot (0.6Ω to 1.0Ω): Many modern devices aim for this middle ground, offering versatility for vapers who enjoy both MTL and restricted DTL vaping.
Step-by-Step Coil Replacement
Replacing a coil isn't rocket science, but doing it properly ensures optimal performance:
-
Empty Your Tank: Nobody wants sticky e-liquid all over their kitchen worktop.
-
Disassemble Carefully: Remove the tank from your device and unscrew the base. Some tanks require removing the drip tip and top cap first.
-
Remove the Old Coil: Unscrew it carefully – sometimes old coils stick, so don't force it.
-
Check the Threading: Wipe away any residue from the connection points.
-
Install and Prime: Screw in your new coil (hand-tight only), prime it as described earlier, reassemble, and wait.
-
Start Low: Begin with lower wattage and gradually increase to find your sweet spot.
The Economics of Coil Care
Let's talk pounds and pence. A decent starter kit costs £20-40, while replacement coils typically run £2-5 each. If proper coil care extends their life from one week to three weeks, you're looking at significant savings over a year.
Consider this: replacing your entire device monthly costs roughly £240-480 annually. Proper coil maintenance might reduce that to £50-100 in replacement coils. That's a holiday to Spain versus a weekend in Skegness.
When to Seek Help
Sometimes coil issues indicate deeper problems. If you're burning through coils weekly despite proper care, or if your device consistently produces dry hits regardless of coil type, it might be time for a chat with your local vape shop.
At Packman Vape, we're always happy to troubleshoot persistent issues. Sometimes it's a simple wattage adjustment; other times, you might need a device upgrade.
Final Thoughts
Coil care isn't glamorous, but it's the foundation of satisfying vaping. Master these basics, and you'll save money, reduce waste, and enjoy consistently better flavour. Your wallet – and the environment – will thank you.
Remember, every expert vaper started exactly where you are now. With a bit of practice, coil maintenance becomes second nature, leaving you free to focus on what really matters: finding your perfect all-day vape.